This topic helps you to install Rational®
ClearQuest® on your system/virtual
machine. It is mainly intended for a regular user.
Before you begin
Ensure that IBM Installation Manager is installed and WebSphere environment is set-up in it
to support the
Rational
ClearQuest
installation.
Note: You need to install AdoptOpenJDK\jre-8.0.212.03-openj9.
About this task
To simply the process, we have covered all supporting installation and configuration required for
Rational
ClearQuest installation
process.
Procedure
These steps explain how to install IBM Installation Manager, then use it to configure
WebSphere environment, and install the latest Rational
ClearQuest version (product package) on
it.
IBM Installation Manager
- To install IBM Installation Manager, download the latest version of Installation Manager
from the following link: https://www.ibm.com/support/pages/installation-manager-and-packaging-utility-download-documents.
Note: Select the Windows 64 version (agent.installer.win32.x86_64_1.8.90003.20190204_1751.zip) or
any other compatible version as per your system requirements.
- Extract the downloaded file and place in a directory. Open the directory and run the
installer (install.exe). For more information, refer to IBM Installation Manager tasks
- On the Install Packages page, click Next to
continue.
- On the Licenses page, select the I accept the terms in the License agreement
and conditions option after reviewing the license agreement.
- On the Summary Page, and click Install to install the Installation
Manager, and then restart Installation Manager.
Before you install Rational
ClearQuest features, install a supported version of IBM® WebSphere Application Server, IBM HTTP Server, Web Plug-ins for IBM WebSphere.
WebSpehere Application Server
- Use the following steps to install WebSphere Application Server by creating a repository
on Installation Manager:
Note: Rational
ClearQuest installation
requires WAS fixpack 11 or later. For example, you can use WAS 8.5.5.12 fixpack. If you want to
install latest version (WAS 8.5.5.14) of WAS, use your IBM fix central credentials to select for
“Check for Other Versions, Fixes, Extensions” and select the box “Show All Versions”. For more
information on installation and configuration of Web Server, refer to
Prepare the WebSphere Application Server environment.
- On the Installation Manager GUI, navigate to .
- On the Preferenceswindow, click Add
Repository.
- In the Repository text box, browse or enter the WAS repository
path.
- Click OK. The repository will be added.
- Select the added path, and click Apply, and then click
OK. The package (base pack and fix pack) will be installed.
- On the IBM Installation Manager GUI, click
Install icon to view the packages.
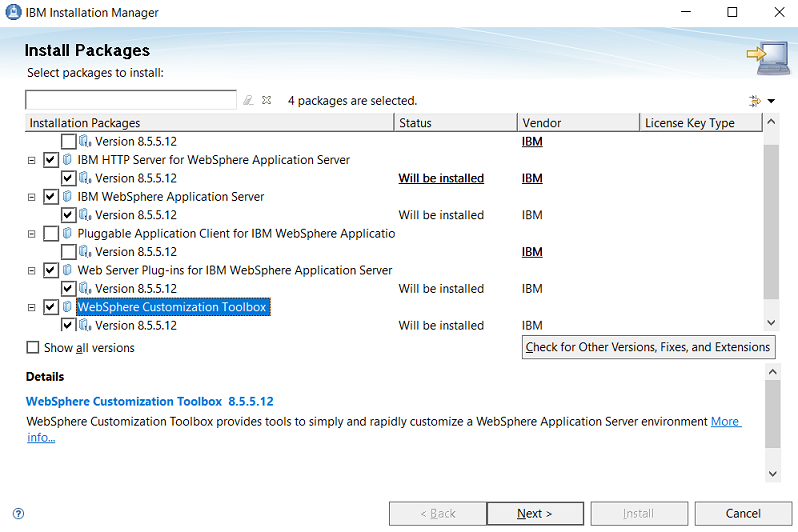
- To install the web components, select the following options (WAS components) from the
Install Packages window, and click Next to install the following
packages:
- IBM HTTP Server
- IBM WebSphere Application Server
- Web Server Plug-ins
- WebSphere Customization Toolbox
- On the Licenses page, read the license agreement for each package, and select the
I accept the terms in the license agreements option if you agree to it, and
then click Next to continue.
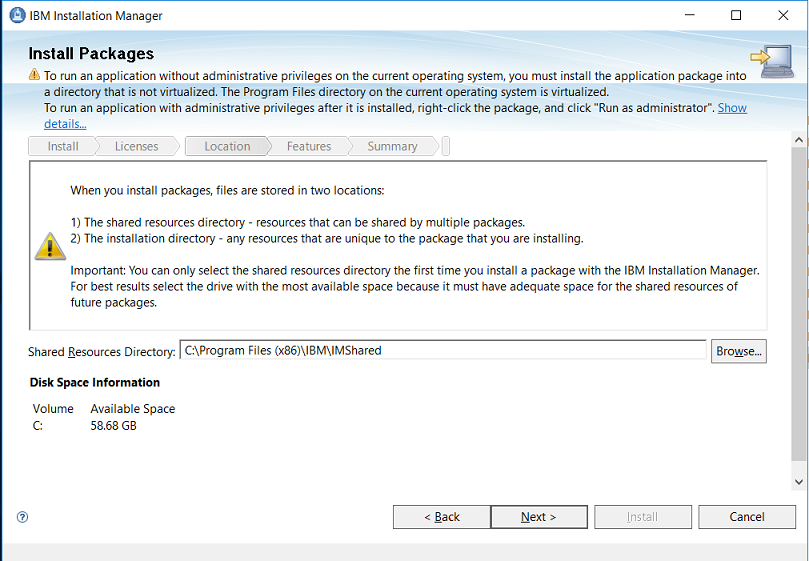
- On the Location page, the default path of installation directory is displayed. If you
want to change it, then browse the required directory where you want to install the package, and
then click Next to continue.
- On the Features page, English language is selected by default. Click
Next to continue.
- On the Features page, the selected WebSphere packages are displayed, click
Next to continue.
- On the Features Configuration page, evaluate the information as appears, and click
Next to continue.
- On the Summary page, all the selected packages will be listed, click
Install to install the WebSphere package.
Note: The installation process takes time based on the network condition as Installation Manager
will collect the files selected/configured from Pinto and IBM fix central.
- After the installation is complete, click Finish.
Rational
ClearQuest
- To install the Rational
ClearQuest product:
- On the Installation Manager GUI, navigate to .
- On the Preferenceswindow, click Add
Repository.
- In the Repository text box, browse or enter the latest product package
path.
- Click OK. The repository will be added.
- Select the added path and click Apply, and then click
OK. The base pack will be installed.
- On the IBM Installation Manager GUI, click
Install icon to view the packages.
- On the Installation Packages page, select the package, and click
Next to continue: